Posts in this series:
- Introduction
- Part 1 - Set up DNS server
- Part 2 - Set up Web server (this one!)
- Part 3 - Secure with DANE
Set up Web Server
In this part, we’ll set up a simple nginx server that just serves a static website. You can also go with any other software like Apache httpd or lighttpd.
Install nginx
# Install nginx
sudo apt install nginx -y

# create a directory to place website
sudo mkdir -p /var/www/smartface
Add content
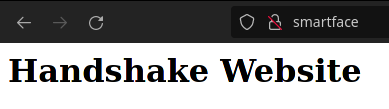
Copy your website files into /var/www/smartface. For this post, we’ll create a
very simple page with one heading:
# create a basic index.html file
sudo sh -c "echo '<html><body><h1>Handshake Website</h1></html>' > /var/www/smartface/index.html"
Configure nginx
Now, we create a new site in nginx and let it know what files to serve on the
website. Use your favorite text editor and create a file
/etc/nginx/sites-available/smartface with this content:
server {
  listen 80;
  listen [::]:80;
  root /var/www/smartface;
  index index.html;
  server_name smartface;
  location / {
    try_files $uri $uri/ =404;
  }
}
Once this site is created, enable it with:
sudo ln -s /etc/nginx/sites-available/smartface /etc/nginx/sites-enabled/smartface

# and then restart nginx
sudo systemctl restart nginx

# check status and make sure no errors with
sudo systemctl status nginx
Finally, we add a DNS record to the DNS server to make the handshake domain point to this web server.
If you’re following this series, then add the record to PowerDNS:
sudo -u pdns pdnsutil add-record smartface. @ A 20.106.52.247
If you have DNS set up elsewhere, the record to add is:
- Name: @ (root of domain)
- Type: A
- Value:
IP address of the web server
Now try visiting the domain to see your content!
With the website now resolving and loading in browsers, the last part is to secure it: Part 3: Secure with DANE.